1. Why Concrete Always Has Moisture
Concrete is porous. Even after it cures, it continues to release moisture vapor from within — a process called moisture vapor emission. This is normal. The problem is when the emission rate exceeds what the flooring system above it can handle.
Several factors drive moisture levels in a slab:
- Residual construction moisture — new slabs can take months to dry fully
- Ground moisture migration — on-grade and below-grade slabs are constantly exposed to moisture from the soil below
- Missing or degraded sub-slab vapor barrier — the barrier that was installed years ago may no longer be intact
- Seasonal changes — moisture levels in concrete shift with humidity and temperature year-round
This is why on-grade and below-grade slabs are always considered high risk — and why a Class I vapor retarder is always recommended, regardless of the test results.
2. The Four Tests — and When to Use Each
Not all moisture tests measure the same thing. Using the wrong test for the situation gives you incomplete data. Here’s what each test actually tells you:
Calcium Chloride Test (ASTM F1869)
This test measures the moisture vapor emission rate (MVER)—how much moisture leaves the slab surface per 1,000 sq. ft. over 24 hours.
- Results expressed in pounds
- Threshold for most flooring systems: 3 lbs or less
- Sealed in place for 60–72 hours before reading
- Best for: adhesive-down installations, wood subfloor systems
Limitation: Only measures surface emission — does not capture what’s happening deeper in the slab.
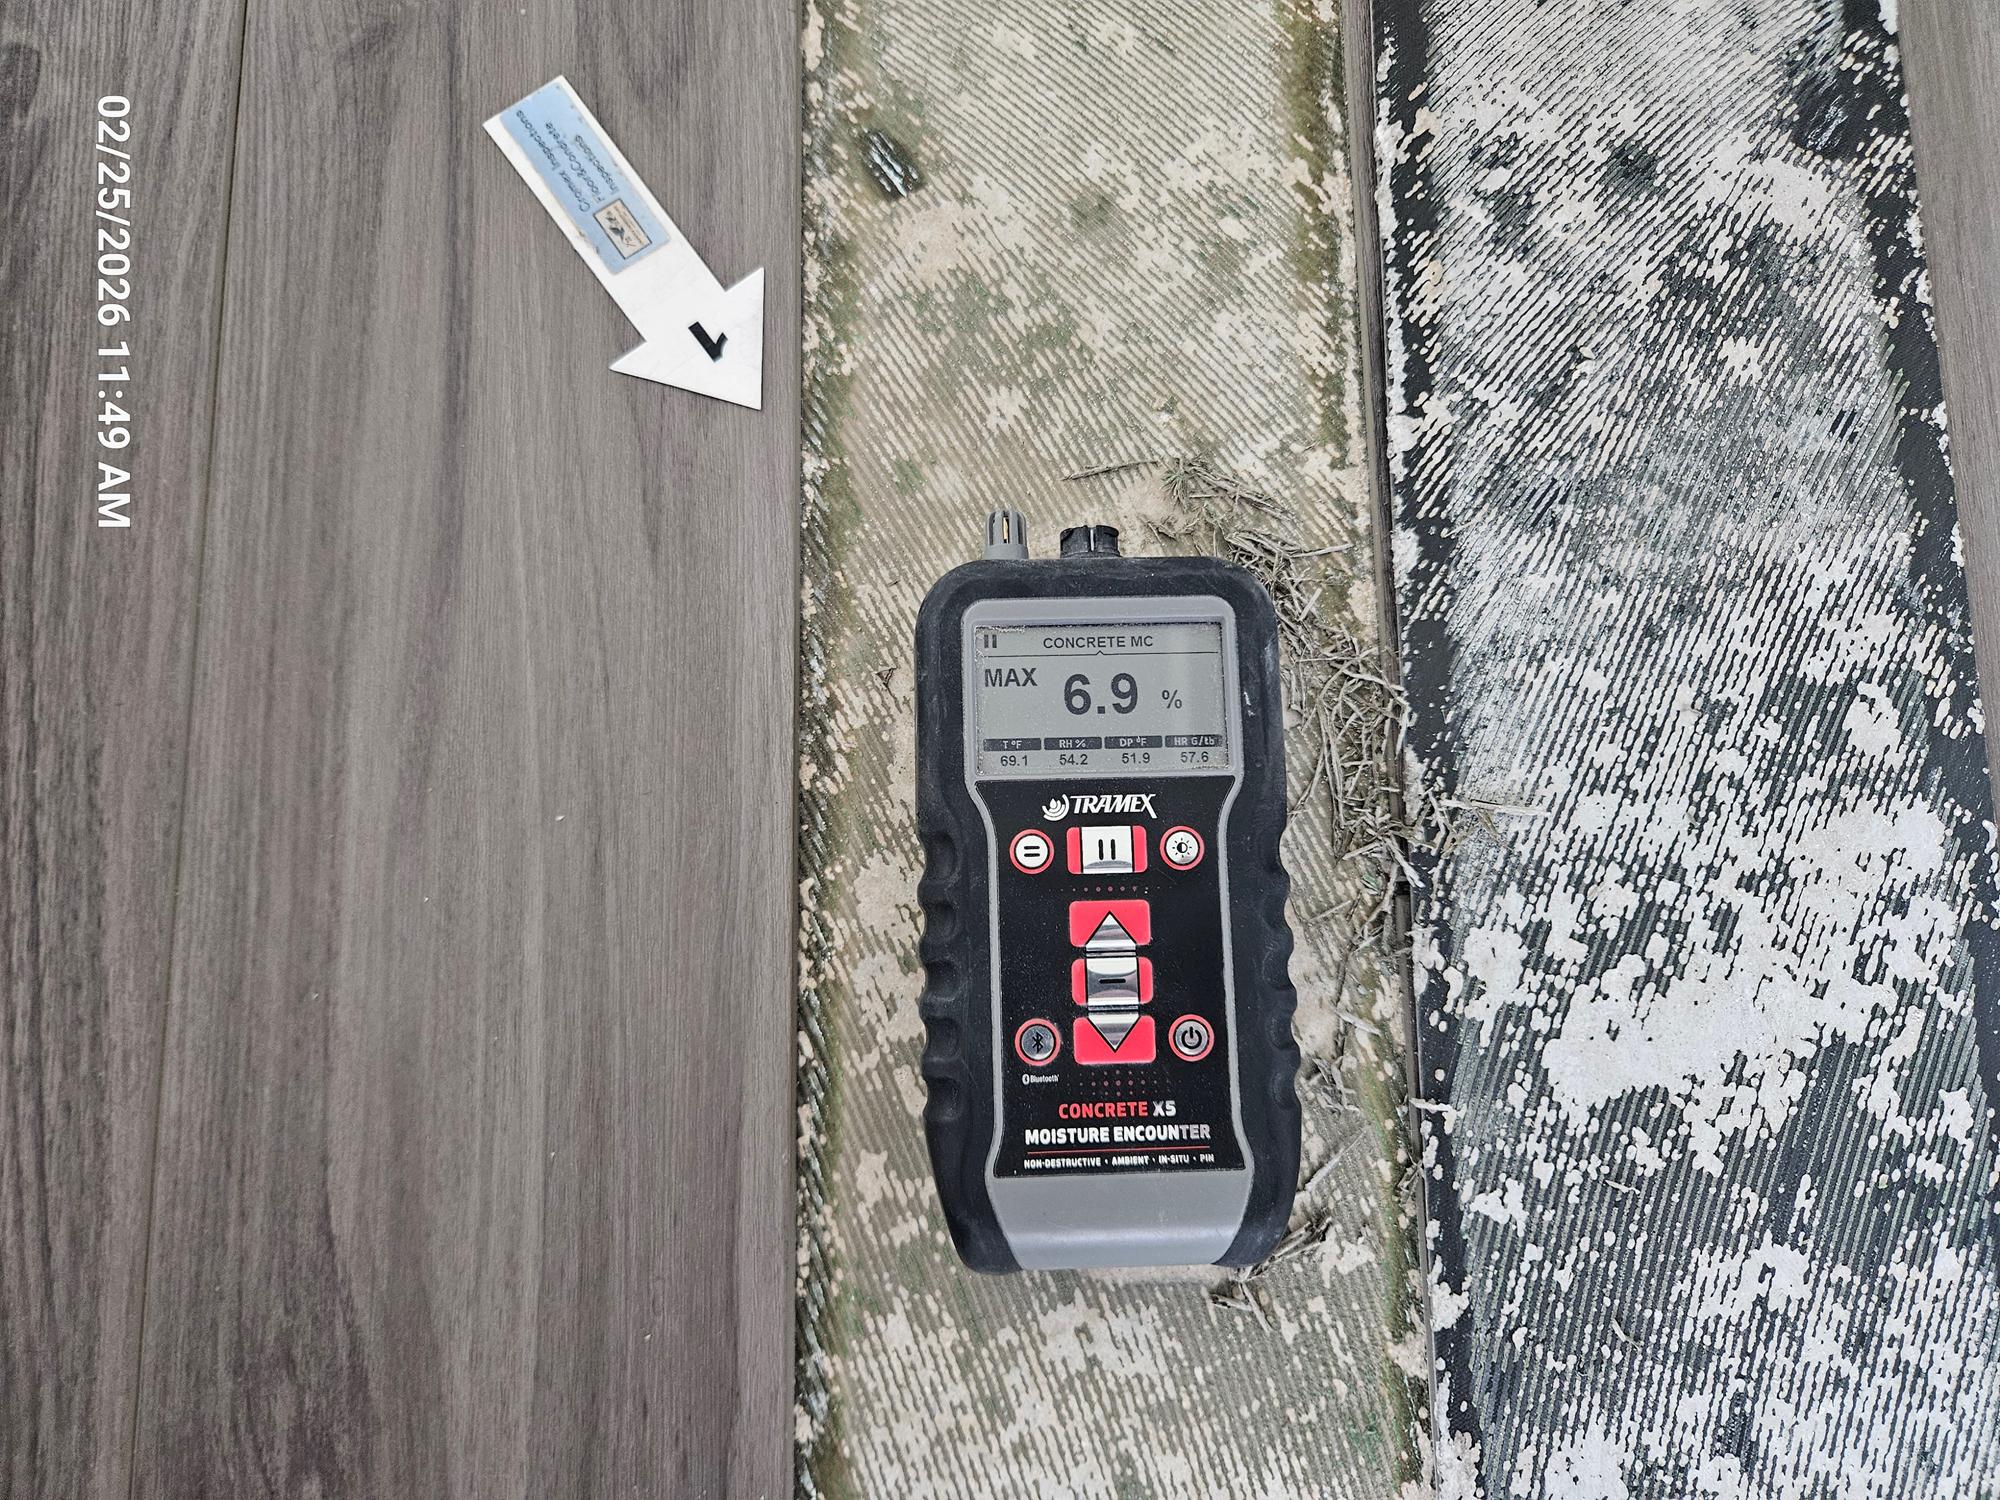
Relative Humidity Test — In-Situ Probe (ASTM F2170)
This test measures internal moisture conditions by inserting probes directly into holes drilled to 40% depth in the slab.
- Results expressed as % RH
- Threshold for most flooring systems: 80% RH or less
- Probes must equilibrate for a minimum of 24 hours before reading
- Best for: the most accurate and complete picture of slab moisture
- This is the gold standard. It tells you what’s happening inside the slab, not just at the surface.
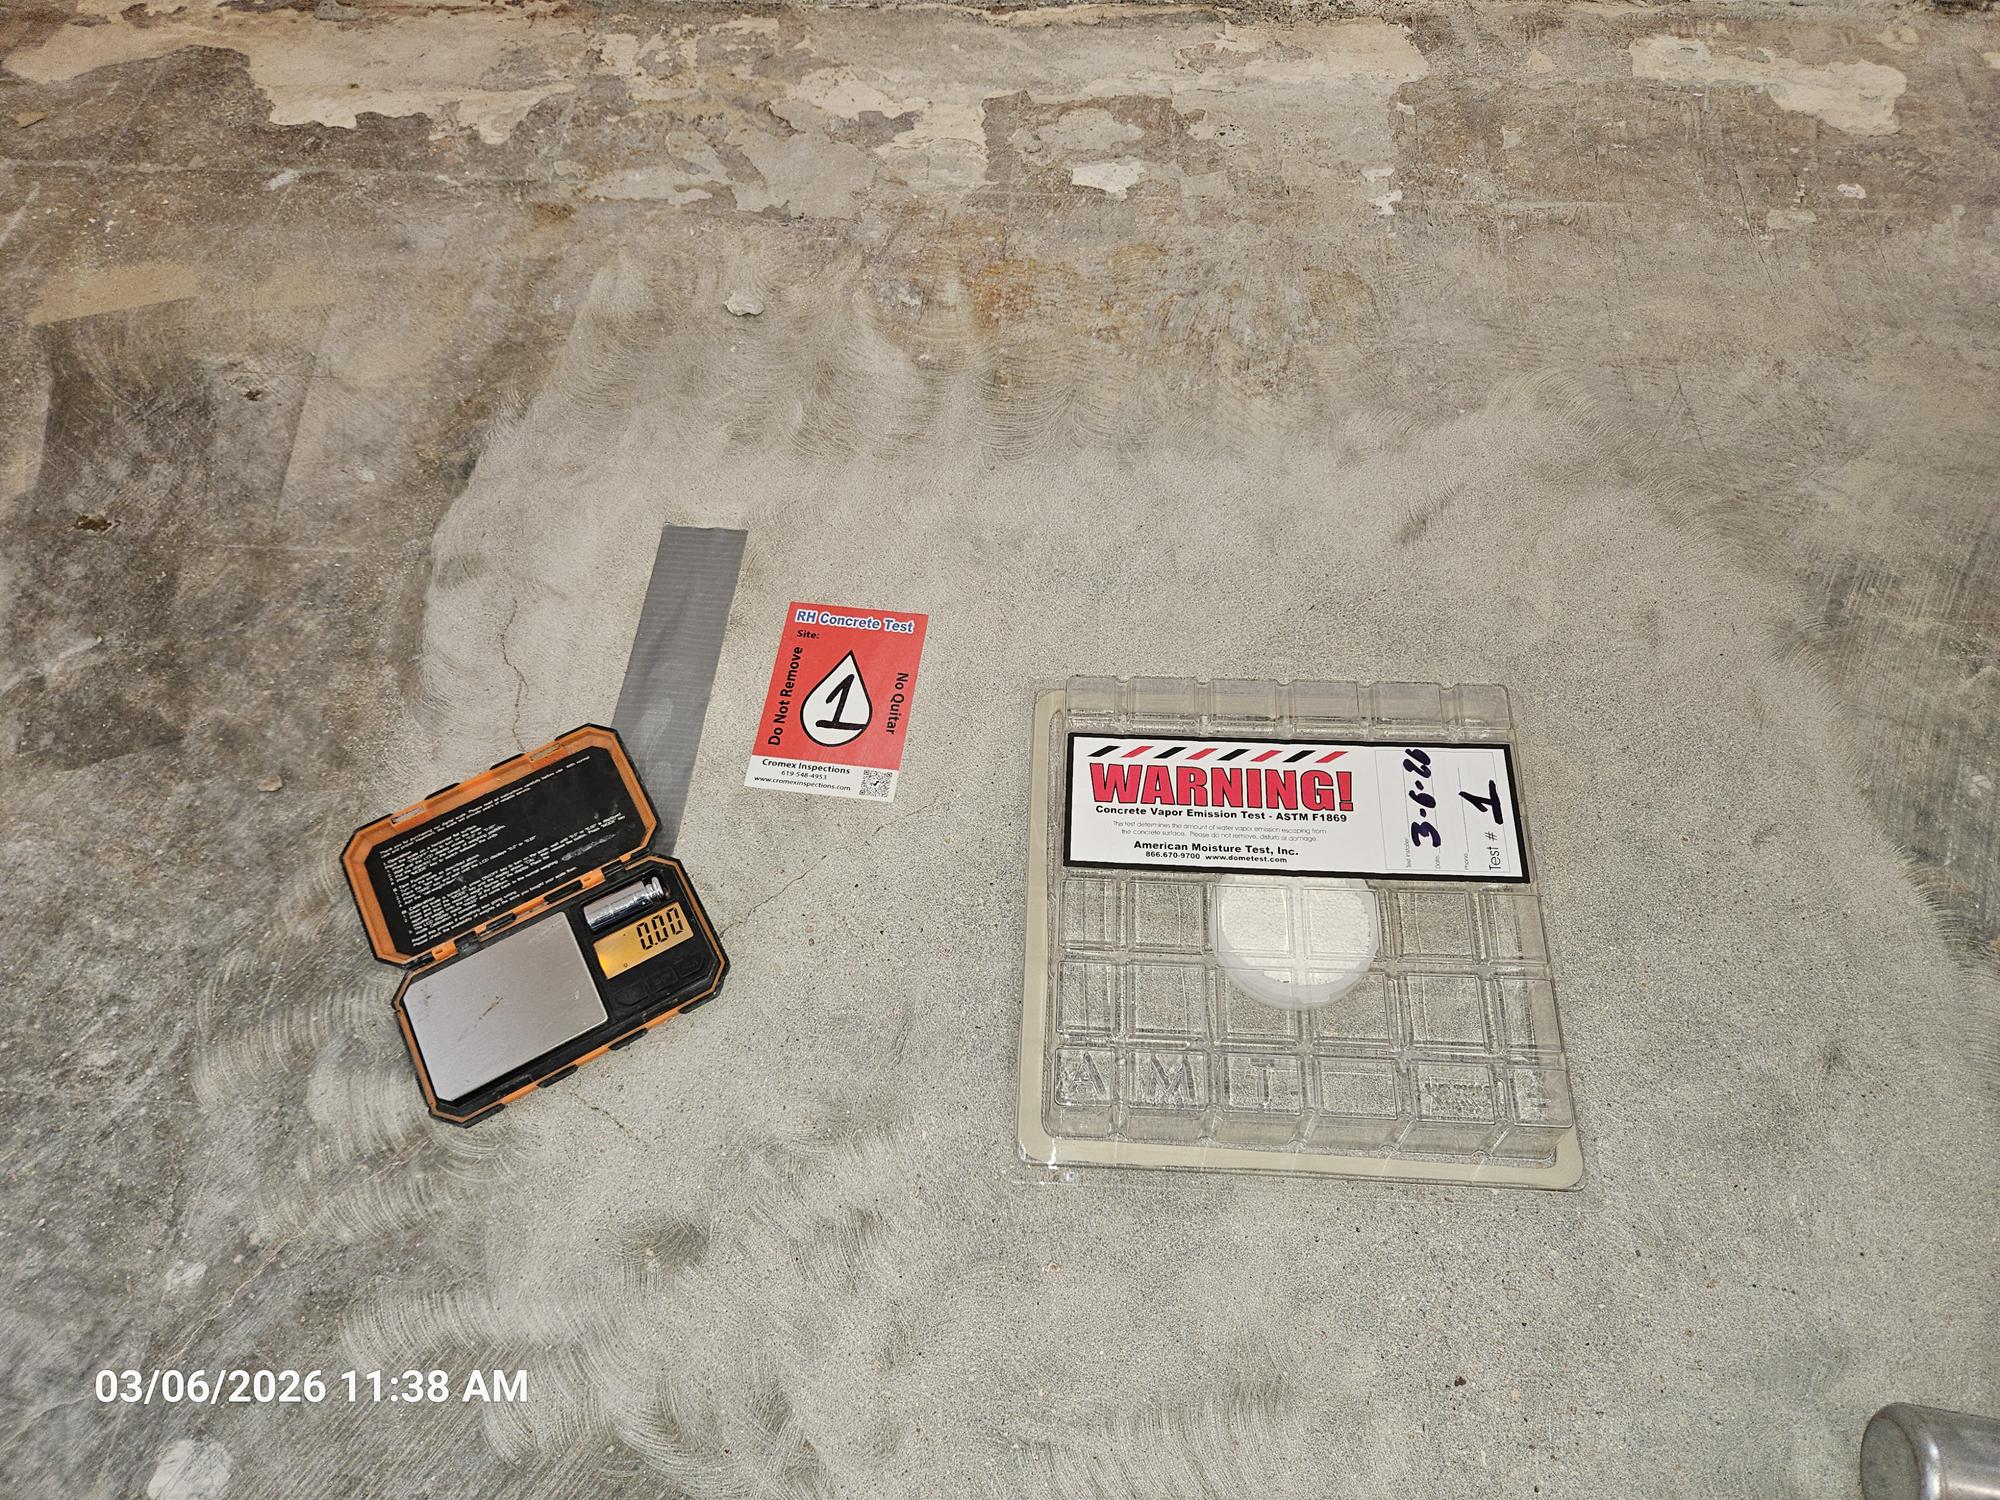
Calcium Carbide Test (ASTM D4944)
A field test using a small concrete sample and a pressure gauge. Results expressed as percentage moisture content.
- Threshold: 2.5% or less
- Fast — results in minutes
- Best for: quick field assessments, preliminary checks
Important: Always follow the flooring manufacturer’s specified test method — they don’t all accept the same test. Some require RH testing specifically. Check before you start.
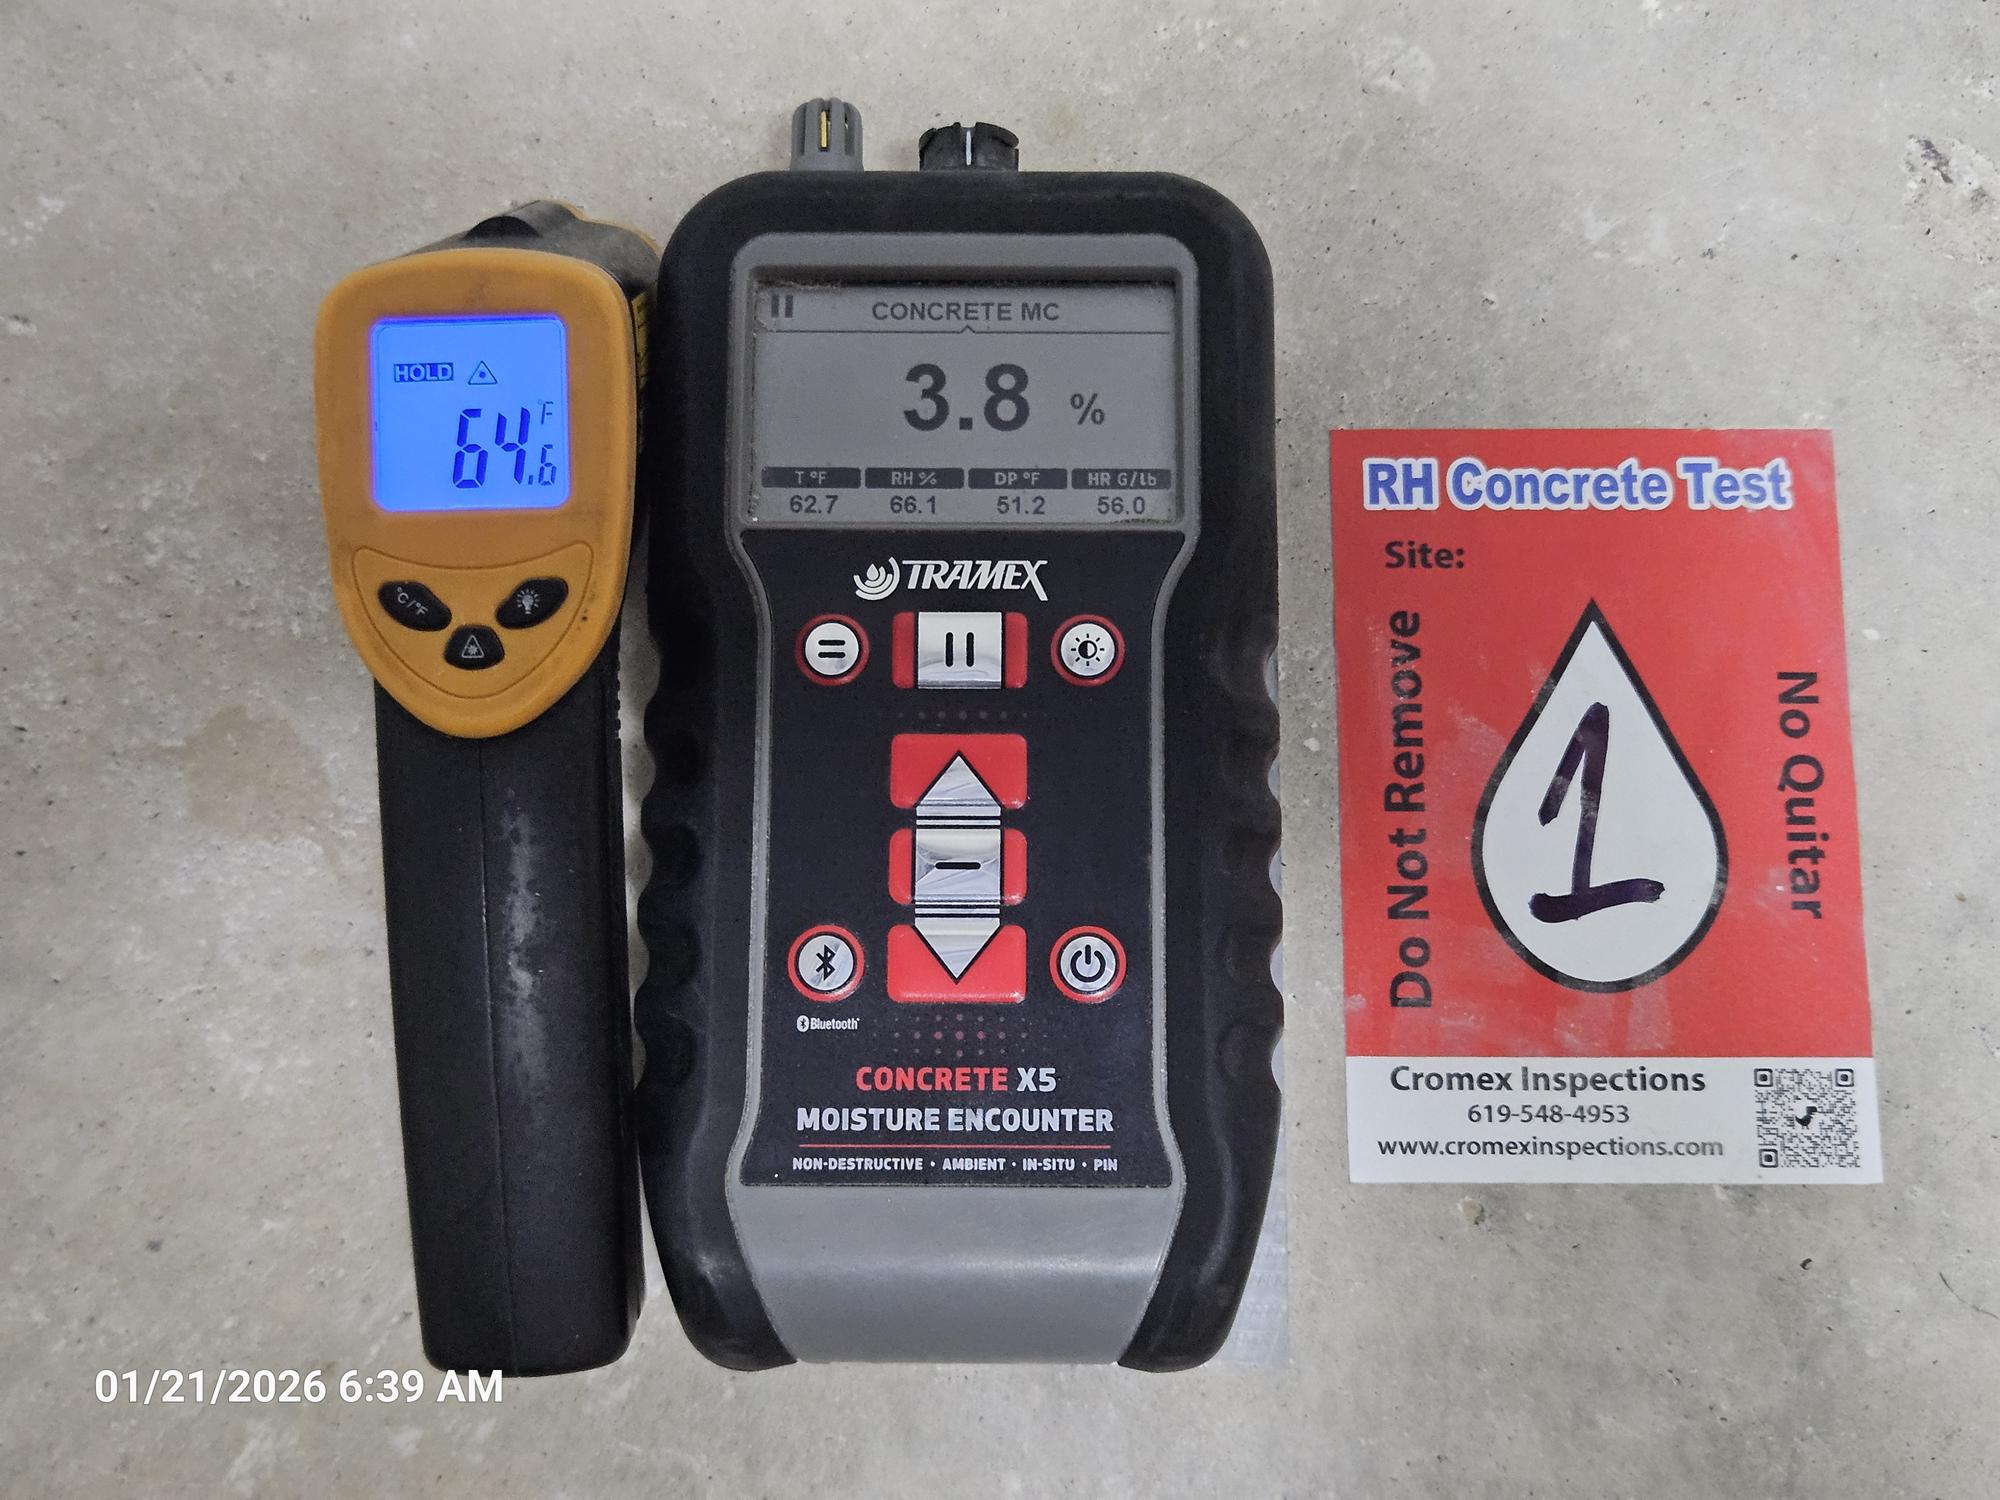
Non-Destructive Moisture Meter Test (ASTM F2659)
This test uses an electronic moisture meter — either pin-type or pinless — to measure moisture levels at or near the concrete surface without drilling or sealing.
- Results are expressed as a moisture content reading or relative scale, depending on the meter
- Best for: preliminary screening and identifying problem areas before committing to full ASTM testing
- Fast, non-destructive, and requires no setup time
- My personal preference for initial walkthroughs and testing at the time of installation — it lets you map the entire slab quickly and identify hot spots that need closer attention with calcium chloride or RH probes
Limitation: ASTM F2659 is a screening tool, not a standalone pass/fail test. Most flooring manufacturers do not accept it as the sole moisture test for installation approval. Always follow up any elevated readings with calcium chloride or RH probe testing before making a final determination.
Important: Always follow the flooring manufacturer’s specified test method — they don’t all accept the same test. Some require RH testing specifically. Check before you start.
3. How Many Tests Do You Need?
Testing one spot is not testing the slab. Moisture distribution in concrete is uneven — a single test in the center of the room can completely miss a wet area near a wall or drain.
ASTM minimum requirements:
- Calcium chloride: 3 tests for the first 1,000 sq. ft., plus 1 additional test for every 1,000 sq. ft. after that
- RH probes: 3 probes for the first 1,000 sq. ft., plus 1 additional probe for every 1,000 sq. ft. after that
In practice, more tests in high-risk areas — near exterior walls, drains, low spots, and below-grade sections — are always better.
4. What the Numbers Mean
| Test | Passing Threshold | Failing Result |
|---|---|---|
| Calcium chloride (MVER) | 3 lbs or less | Greater than 3 lbs |
| Relative humidity (RH) | 80% RH or less | Greater than 80% RH |
| Calcium carbide | 2.5% or less | Greater than 2.5% |
| Moisture meter (ASTM F2659) | Varies by meter/manufacturer | Elevated readings = flag for further testing |
If any test fails, do not install flooring until the moisture issue is addressed. Options include:
- Moisture mitigation coating or membrane system
- Topical moisture barrier (verify compatibility with adhesive)
- Dehumidification and extended drying time
- Upgraded vapor retarder system
Always verify that the mitigation system used is compatible with the flooring and adhesive being installed over it. Incompatible products are a common and expensive mistake.
5. Document Everything — Every Time
Testing without documentation is almost as bad as not testing at all. If a claim is filed and you can’t prove what the readings were at the time of installation, you have no defense.
On every concrete moisture test, document:
- Test method used (ASTM reference)
- Number of tests and locations on a floor plan sketch or photo
- Date and time of each reading
- Temperature and relative humidity at the time of testing
- Equipment used (make, model, calibration date)
- Actual readings at each location
- Pass/fail determination
- Any remediation taken and products used
Photograph every test location. Photograph every reading. Keep records on file with http://www.provadocs.com.
6. When to Call a Professional Inspector
DIY moisture testing with a basic pin meter is better than nothing — but it is not a substitute for proper ASTM-compliant testing, especially when:
- The slab is on-grade or below-grade
- The building is newly constructed or recently renovated
- There is a history of moisture problems in the space
- The flooring system is high-value (solid hardwood, engineered wood, luxury vinyl)
- The installation will be used for warranty or insurance purposes
- A previous flooring installation has failed
A certified flooring inspector follows ASTM protocols, uses calibrated equipment, documents results properly, and provides a report that holds up if a dispute arises. That report is what protects everyone in the chain — the installer, the contractor, and the property owner.
The Bottom Line
Concrete moisture testing is not a formality. It is the single most important step before any flooring goes down over a concrete slab.
Test with the right method. Test enough locations. Use calibrated equipment. Document every result. And if the numbers fail, stop and fix the problem before you install.
A moisture test costs a fraction of what a failed floor would cost to remove, replace, and litigate over.
Do it right the first time.
Daniel — NWFA Certified Flooring Inspector | Cromex Inspections. For professional concrete moisture testing and floor inspection services, visit http://www.cromexinspections.com