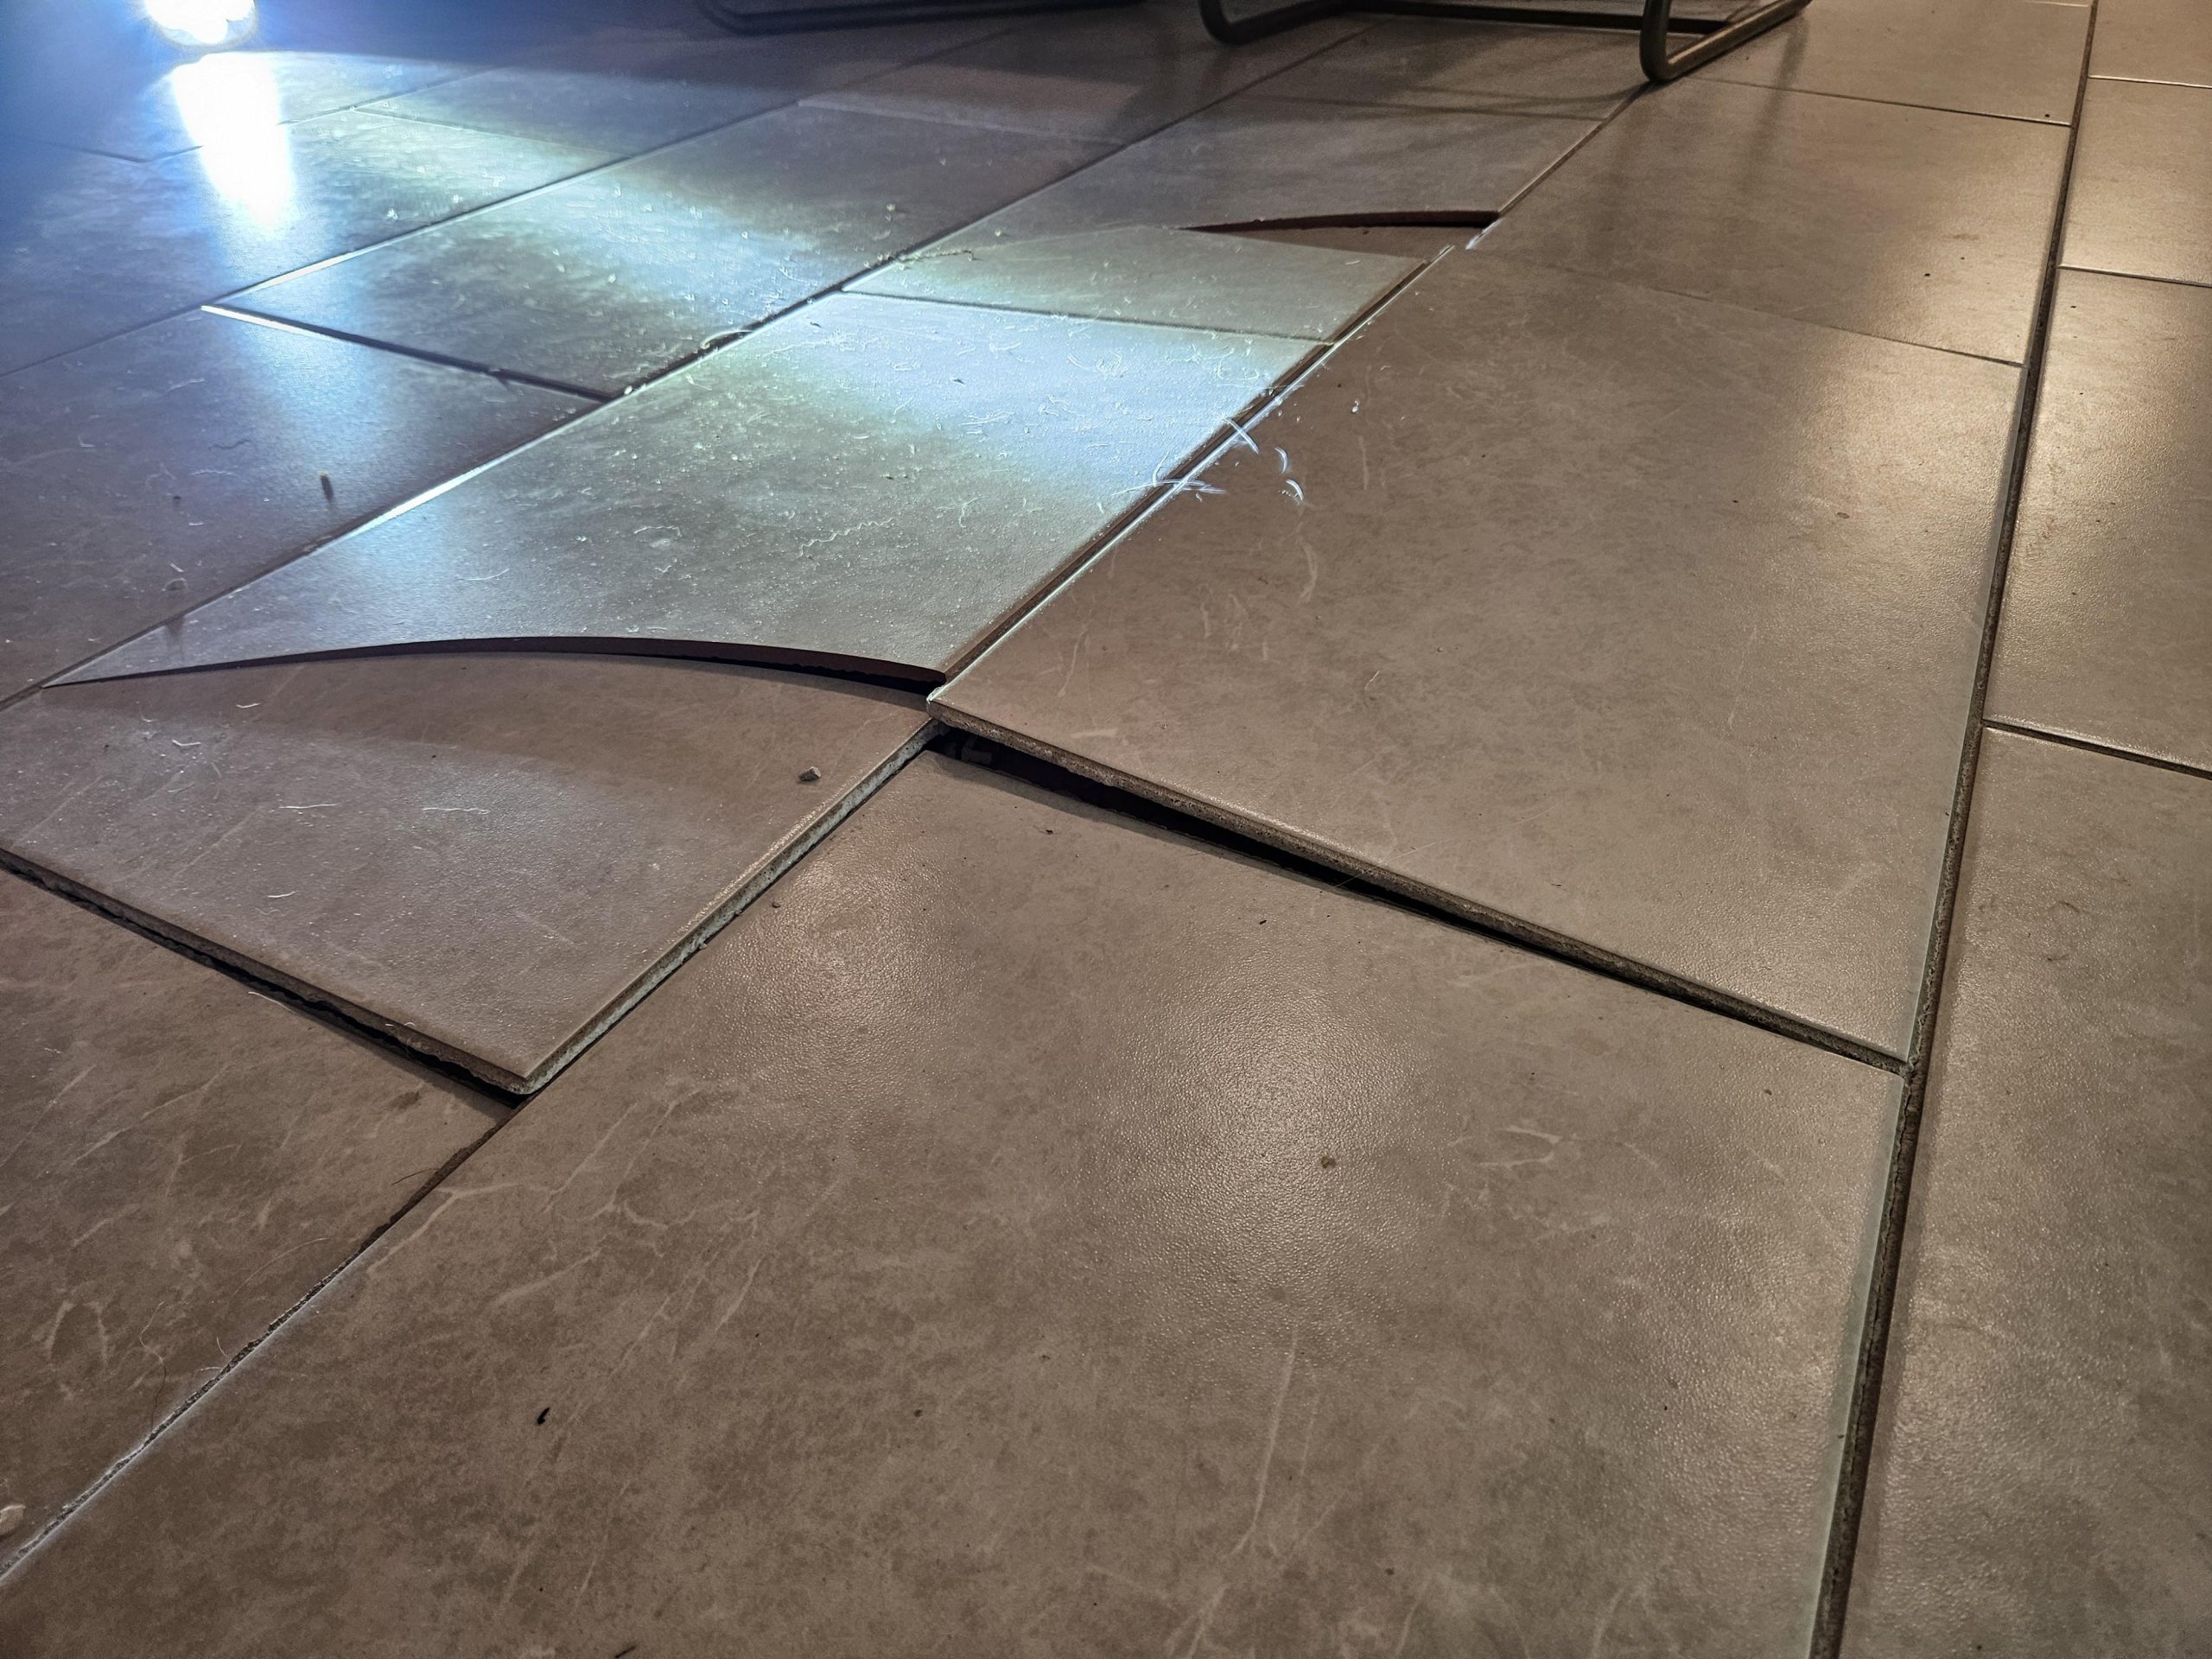
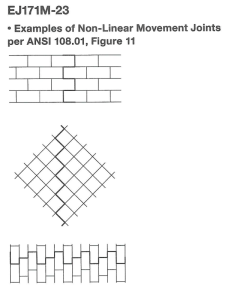
Movement joints are designed to absorb and accommodate movement, preventing stress from being transferred into the tile or grout. Cracked tile, tenting, debonding, and grout failure are commonly traced back to missing, improperly placed, or undersized movement joints.
Design Responsibility and Project Planning
Because tile installations can be placed over a wide range of substrates and structural systems, EJ171 does not prescribe a single universal layout. Instead, the guideline places responsibility on the design professional or engineer to determine joint locations and details during the design phase.
Key responsibilities include:
- Movement joint locations and spacing are shown on the project drawings
- Joint details coordinated with framing, substrates, and finishes
- Sealants and backup materials specified in project documents
The tile contractor’s responsibility is to install movement joints as designed and to ensure that all existing substrate joints are carried through the tilework.
Location and Frequency of Movement Joints
The required spacing of movement joints depends on exposure conditions and substrate type.
Interior installations (typical conditions):
- Maximum spacing: 25 feet in each direction
Interior installations exposed to sunlight or moisture:
- Maximum spacing: 12 feet in each direction
Above-ground concrete slabs:
- Maximum spacing: 12 feet in each direction
Exterior installations:
- Maximum spacing: 8 to 12 feet in each direction
- Closer spacing may be required depending on climate, tile type, and exposure
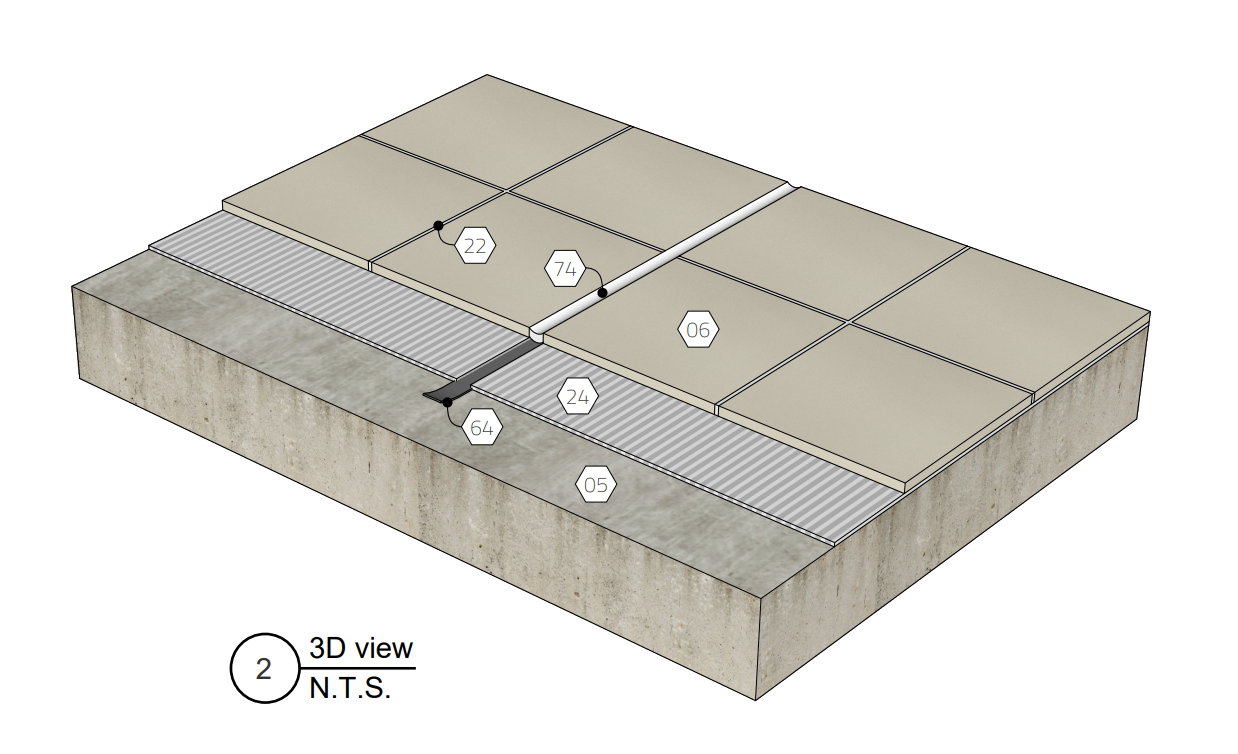
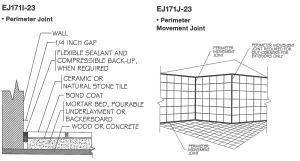
Perimeter Joints and Changes of Plane
Movement joints are required wherever tile abuts a restraining surface. These locations are among the most frequently missed in the field.
Movement joints are required at:
- Perimeter walls
- Columns, curbs, and pipe penetrations
- Ceilings and vertical transitions
- Changes in backing materials
- Dissimilar flooring materials
- Interior corners (interior installations)
- Inside and outside corners (exterior installations)
Movement joints are not required at drain strainers.
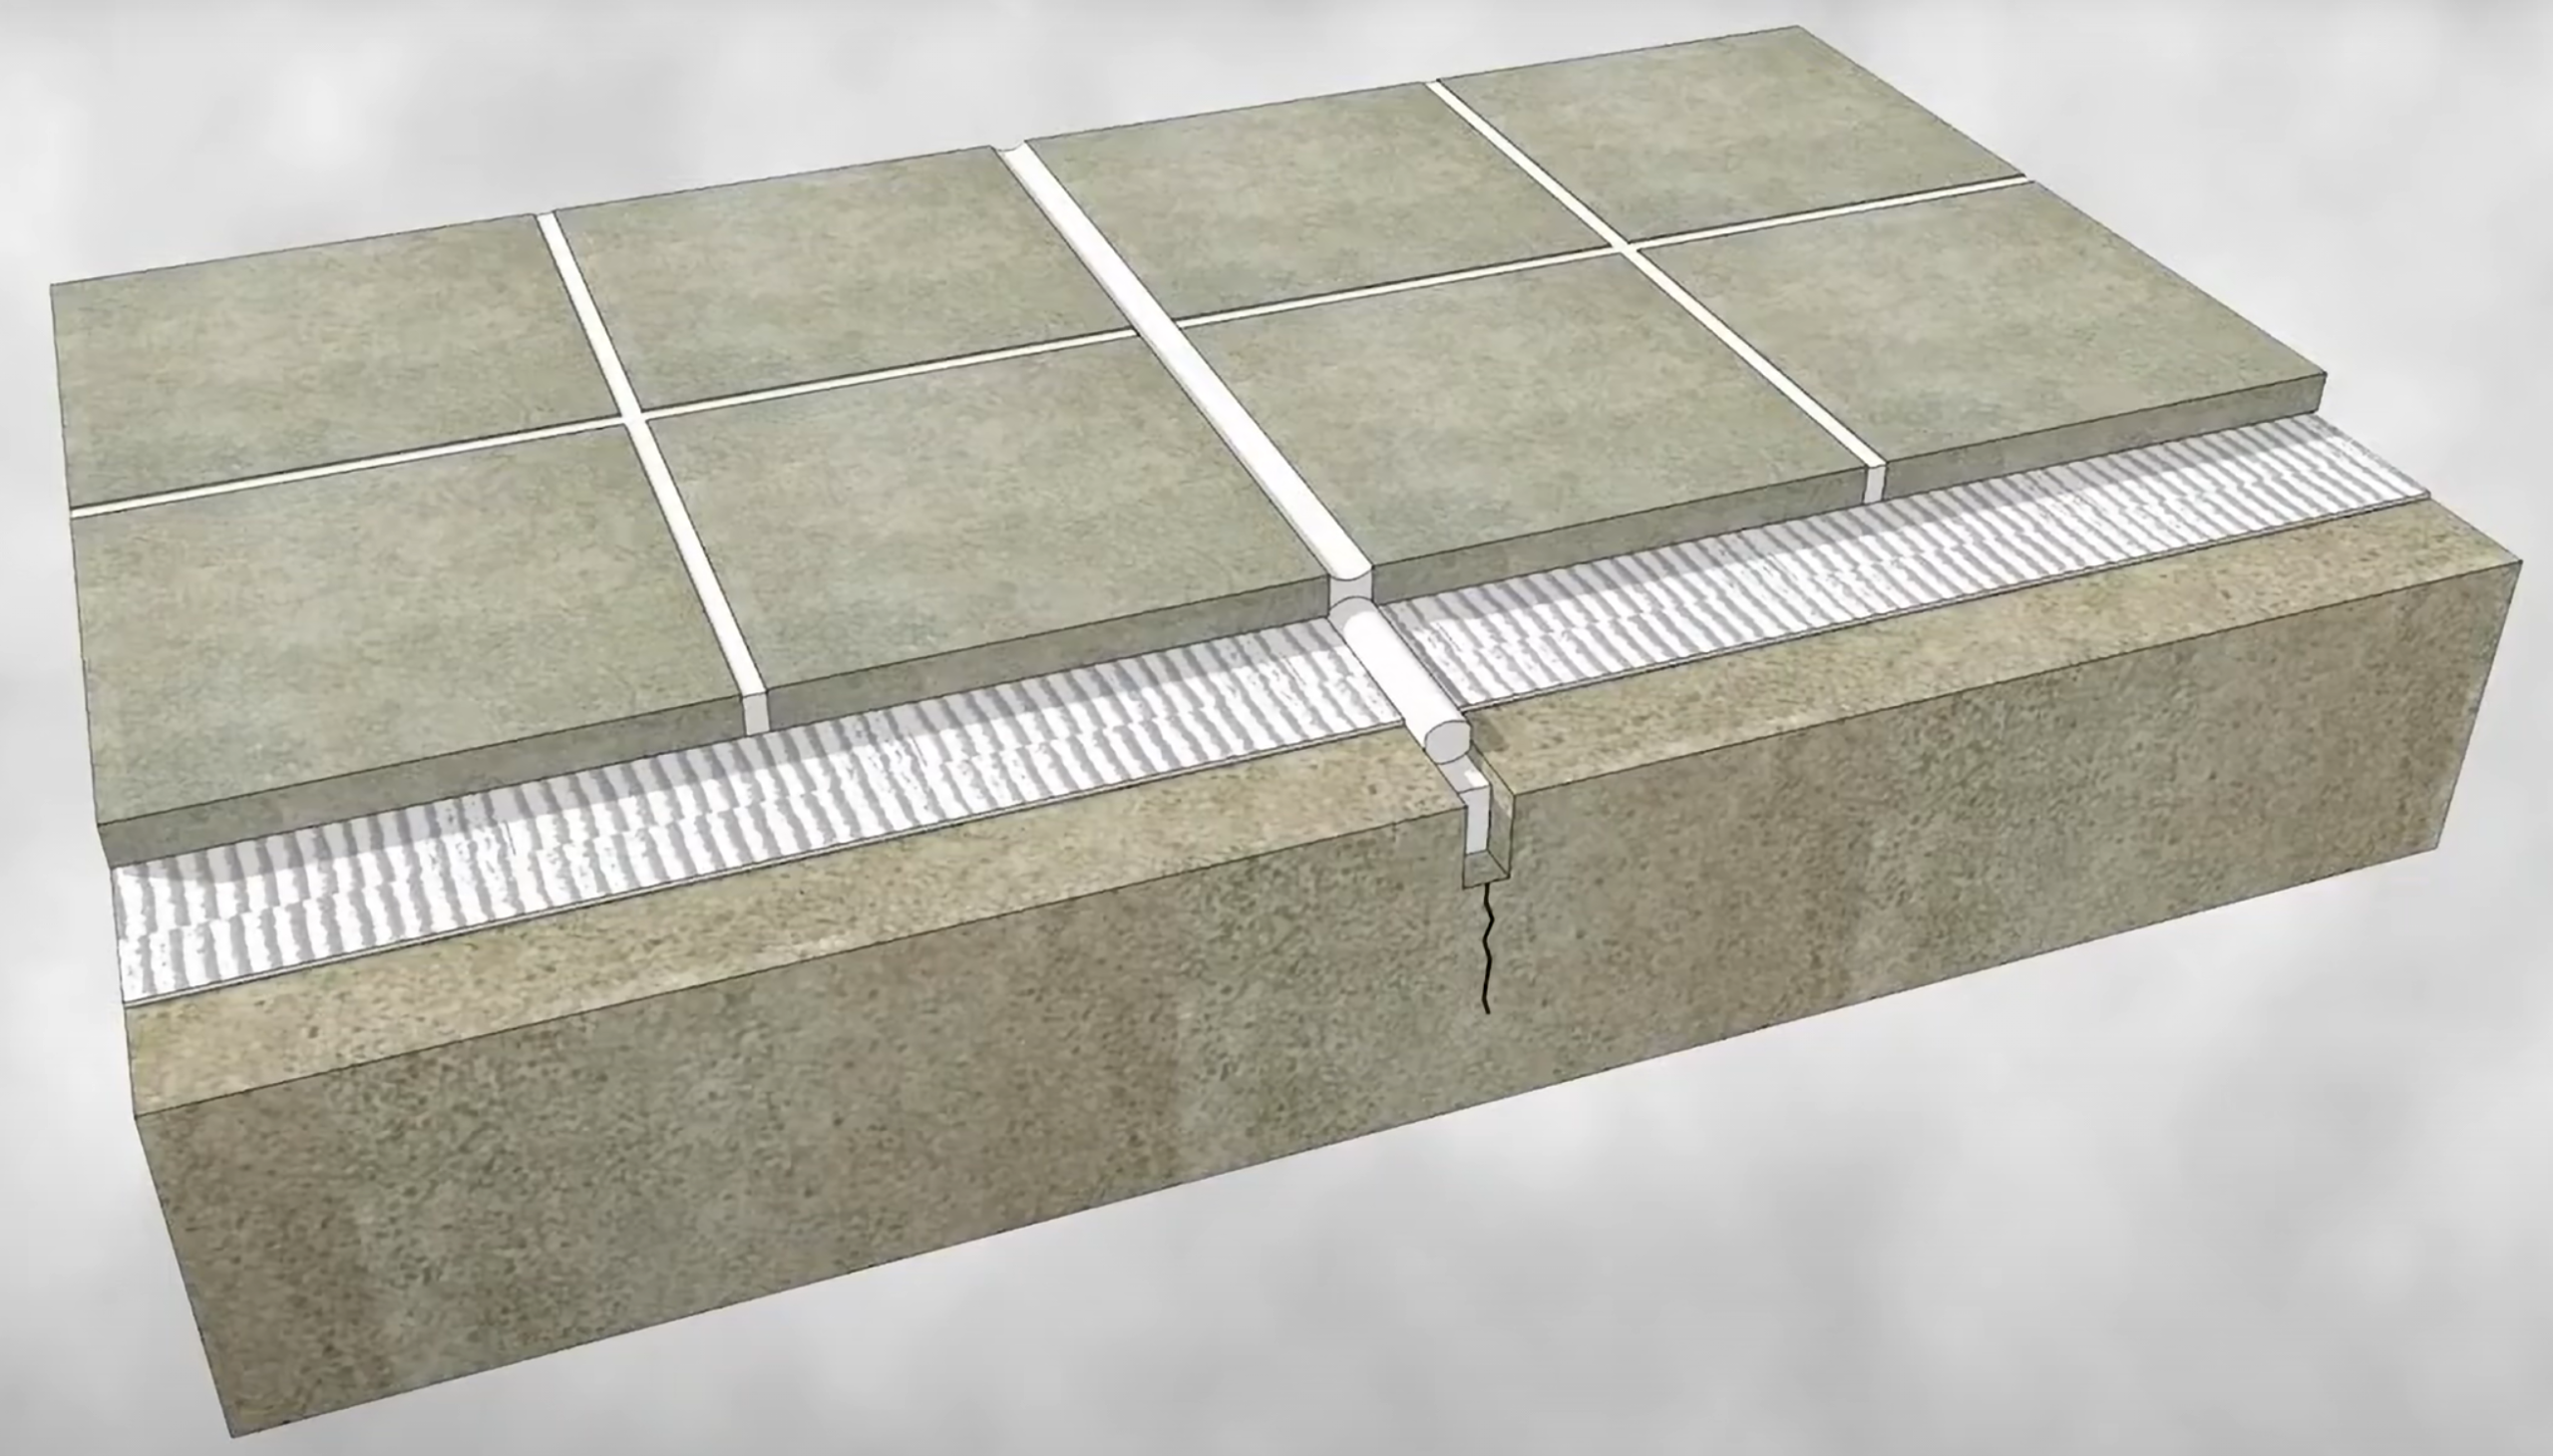
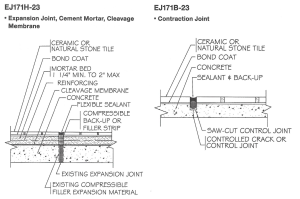
Structural Joints Must Be Honored
All structural joints in the substrate must continue uninterrupted through the tile installation. These include:
- Expansion joints
- Control and contraction joints
- Construction and cold joints
- Isolation and seismic joints
- Saw-cut joints
Tile movement joints placed over these locations must:
- Align directly over the substrate joint
- Never be narrower than the structural joint below
If a crack isolation membrane is used to relocate a movement joint contrary to EJ171, the tile contractor is not responsible for cracking over the original joint, provided all materials were installed correctly.
Movement Joint Width Considerations
Joint width must be sufficient to accommodate expected movement. EJ171 provides minimum guidelines, but the actual width may need to be increased based on temperature variation and tile properties.
Exterior installations:
- 8 ft spacing: minimum 3/8 inch
- 12 ft spacing: minimum 1/2 inch
- Increase joint width 1/16 inch for every 15°F above a 100°F temperature differential
Interior installations:
- Perimeter joints at walls: minimum 1/4 inch (often concealed by trim)
- Other perimeter joints: preferred 1/4 inch, never less than 1/8 inch
- Change-of-plane joints: same as grout joint, but never less than 1/8 inch
For dry interior installations not exposed to direct sunlight, EJ171 allows the joint width to be calculated based on:
- Tile size
- Distance between joints
- Temperature range
- Tile’s coefficient of linear thermal expansion
Regardless of calculations, movement joints must never be less than 1/8 inch wide.
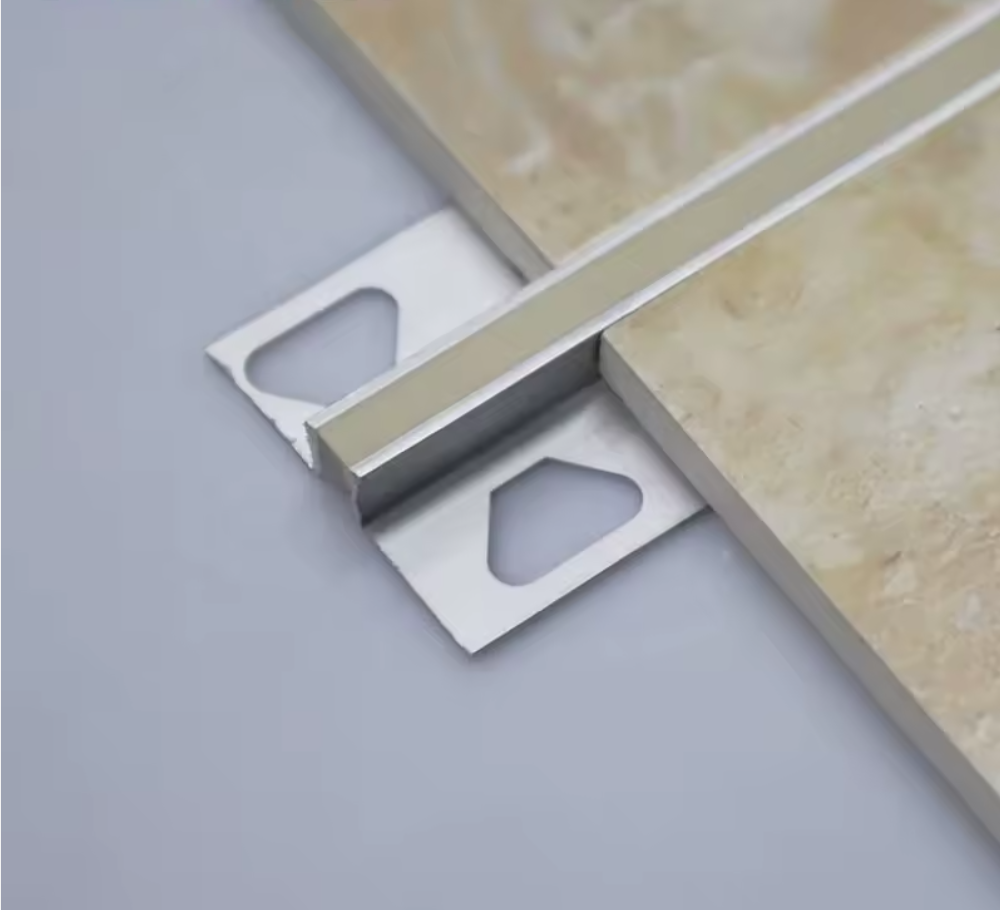
Joint Depth, Backer Rod, and Sealants
Proper joint performance depends on correct depth and materials, not just width.
Joint depth guidelines:
- Exterior joints ≤ 1/2 inch wide: depth approximately 1/4 inch
- Wider exterior joints: 2:1 width-to-depth ratio
- Interior joints: preferred depth 1/4 inch
Backup materials (backer rod):
- Must be compressible and properly sized
- Prevents three-sided bonding
- Controls sealant depth
- Sealant must bond only to tile edges, not the backup material
Sealant requirements:
- Must comply with ASTM C920
- Silicone, urethane, and polysulfide sealants are acceptable
- Urethane sealants recommended for:
- Traffic areas
- Exterior horizontal surfaces
- Silicone sealants are commonly used for:
- Vertical surfaces
- Wet interior areas (showers, tubs)
Sealants used in traffic areas must have a Shore A hardness of at least 25.
Installation Best Practices
Even correctly designed joints will fail if installed improperly.
Best practices include:
- Constructing movement joints during installation, not after
- Keeping joint cavities free of mortar, grout, and debris
- Installing backer rod at the correct depth
- Applying sealant only after tile and grout have cured
- Following the sealant manufacturer’s instructions exactly
Final Takeaway
Movement joints are not cosmetic details or optional upgrades. They are a fundamental requirement for long-term tile performance. EJ171 exists to manage movement that will occur over the life of the installation.
Tile doesn’t fail because it moves — it fails because movement is restrained.